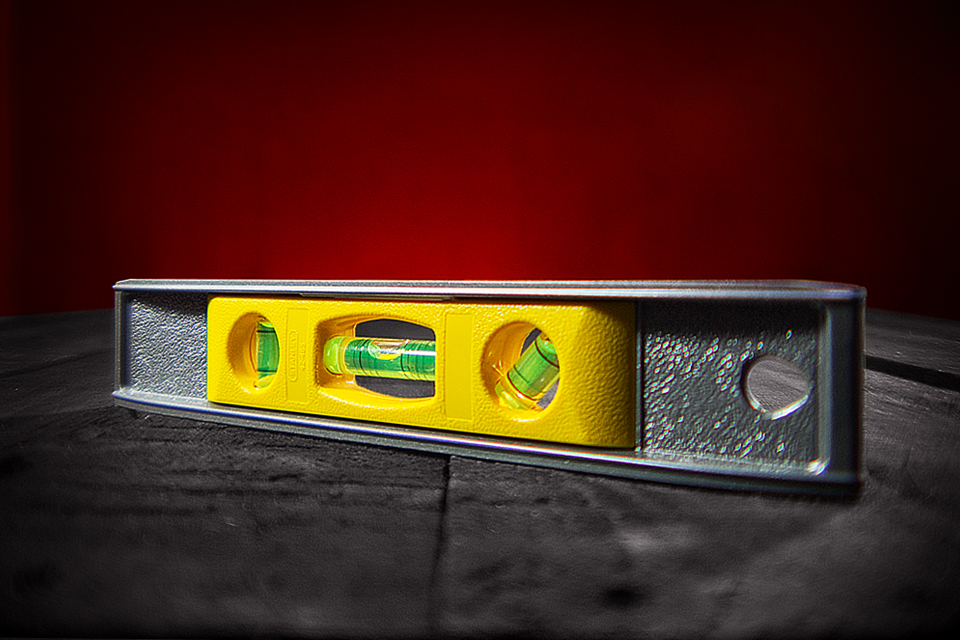
Torpedo Levels
Torpedo Levels are spirit levels that are built small for use in tight spaces and are excellent for levelling pipes and conduit, making these levels the perfect addition to any plumbers' or electricians' tool pouch.
Torpedo Levels typically have 3 vials to find the true horizontal, plumb, and the perfect 45° angle or angles between 0° and 90°. Some Torpedo Levels such as the IRWIN® 1794155 have replaced the stationary 45° vial with a rotating vial built to level angles UP TO 45°!
√ The horizontal vial in the center of the level is used to find the true horizontal.
√ The vertical vial at the end of the level is used to find the true vertical.
√ The angled vial at the other end of the level is used to find level at or up to 45°.
Inspection and Cleaning
Before use, inspect the body of the level and be sure to clean your level of all dirt and any buildup along the edge and body. Then check to see that the vials aren’t cracked, empty or have their view obstructed by dirt. Clean as necessary. Look along the edges of the level to see if it is warped or no longer looking like it is straight. If it’s not straight, then the level won’t work properly and you won’t get accurate level readings.
Become familiar with how to hold the level without getting your hands in the way of viewing the vials.
There is usually an edge on the level that is magnetic, grooved or both:
- The grooved edge is for placing against pipe or conduit. The groove is built to help keep the level in line with the pipe
- The magnetic edge is built to stick to metal objects to allow for hands-free use of the level so you can use both hands for moving the object to get it level
Inspection and Cleaning
To Find the True Horizontal:
- Place the level in a horizontal and parallel position on the object you are trying to make level
- The vial has lines on it separating it into 3 sections
- Look at the vial that is in a horizontal position while the level is also in a horizontal position and try to center your line of vision with the lines on the vial so you can get the most accurate reading
- The goal is to get the bubble that floats in the fluid of the vial to be in the middle section of the two lines. WHEN THIS HAPPENS THE OBJECT IS LEVEL HORIZONTALLY
- If the bubble is to the left of center, then the right side of the object needs be raised or the left side needs to be lowered until the bubble is in the middle of the two lines
- If the bubble is to the right of center, then the left side of the object needs to be raised or the right side needs to be lowered until the bubble is in the middle of the two lines
To Find the True Vertical (Plumb):
- Place the level in a vertical and parallel position on the object you are trying to make level
- The vial has lines on it separating it into 3 sections
- Look at the vial that is in a horizontal position while the level is in a vertical position and try to center your line of vision with the lines on the vial so you can get the most accurate reading
- The goal is to get the bubble that floats in the fluid of the vial to be in the middle section of the two lines. WHEN THIS HAPPENS THE OBJECT IS LEVEL VERTICALLY
- If the bubble is to the left of center, then the lower end of the object needs be moved to the right or the top end needs to be moved to the left until the bubble is in the middle of the two lines
- If the bubble is to the right of center, then the lower end of the object needs to be moved to the left or the upper end needs to be moved to the right until the bubble is in the middle of the two lines
To Find the Level of an Angle:
- Check if your level has a rotating angle vial and adjust it to the degree you want to measure. Some levels do only 45° measurements where others can do anything from 0° to 90°
- Place the level on the object in parallel position to the angle you are trying to make level
- The vial for measuring the angle should be in a horizontal position while the level is at an angle
- The vial has lines on it separating it into 3 sections
- Look at the end vial of the level that is for measuring the angle and try to center your line of vision with the lines on the vial so you can get the most accurate reading
- The goal is to get the bubble that floats in the fluid of the vial to be in the middle section of the two lines. WHEN THIS HAPPENS THE OBJECT IS LEVEL TO YOUR DESIRED ANGLE
- If the bubble is to the left of center, then the lower part of the object needs to be moved upwards or downwards, or the upper part needs to be moved upwards or downwards until the bubble is centered
- If the bubble is to the right of center, repeat the same as above until the bubble is centered
